
Set up your club
Work through the Setup checklist: logo, colors, club agreement, Stripe and products.
Everything a new club needs lives in Club Settings, and its first tab, Setup, is a checklist that ticks itself off as you go. Most clubs finish it in about fifteen minutes.
Open the Setup checklist
Open the checklist
While setup isn’t finished, the bottom of the sidebar on the left shows Set up your club with a progress bar. Click it to see the steps left, each with a button that takes you to it. See all in Settings opens the full checklist in Club Settings.
Work down the list
Each row has one button. It jumps to the right tab, scrolls to the field and highlights it. Rows you’ve finished get a check and an Edit button. The ? on each row opens the matching part of these guides.
Club Settings
Riverside Athletic Club
Get your club set up
4 of 8 doneBrand
Members
Payments
Plan
Brand: logo, color and website
These three live on the Details tab and appear on your login page, your store and every email.
- Logo: click Upload under Logo. A square image works best. Remove it with the × next to it.
- Brand color: click the eyedropper swatch under Color and pick your club color. It saves when you let go. Pick something dark enough that white text on it is easy to read; Reset goes back to the default blue.
- Website: type your site’s address in the Website field and press Enter. Your logo on the login page links there.
The same tab holds Club Name, Club Email and Address. They save as you leave each field.
Your club website
Every club gets a free one-page website at fencingoffice.com/club/your-club. It’s built from what you’ve already set up, so there’s nothing to design: your logo and brand color, a Create account button (your join link) and Log in, your weekly classes and booking calendars, a few store products, and your address with a Get directions link, plus your website, Club Email and phone.
- Sections without anything in them are left out, so a brand-new club still gets a clean page.
- On the Club website row of the Setup checklist, Copy link copies the address and the open-in-new-tab button next to ? opens it. It’s also under the Website field on Details.
- Changes show up on the page within about five minutes.
- Only club details appear on it. Member names, emails and bookings never do.
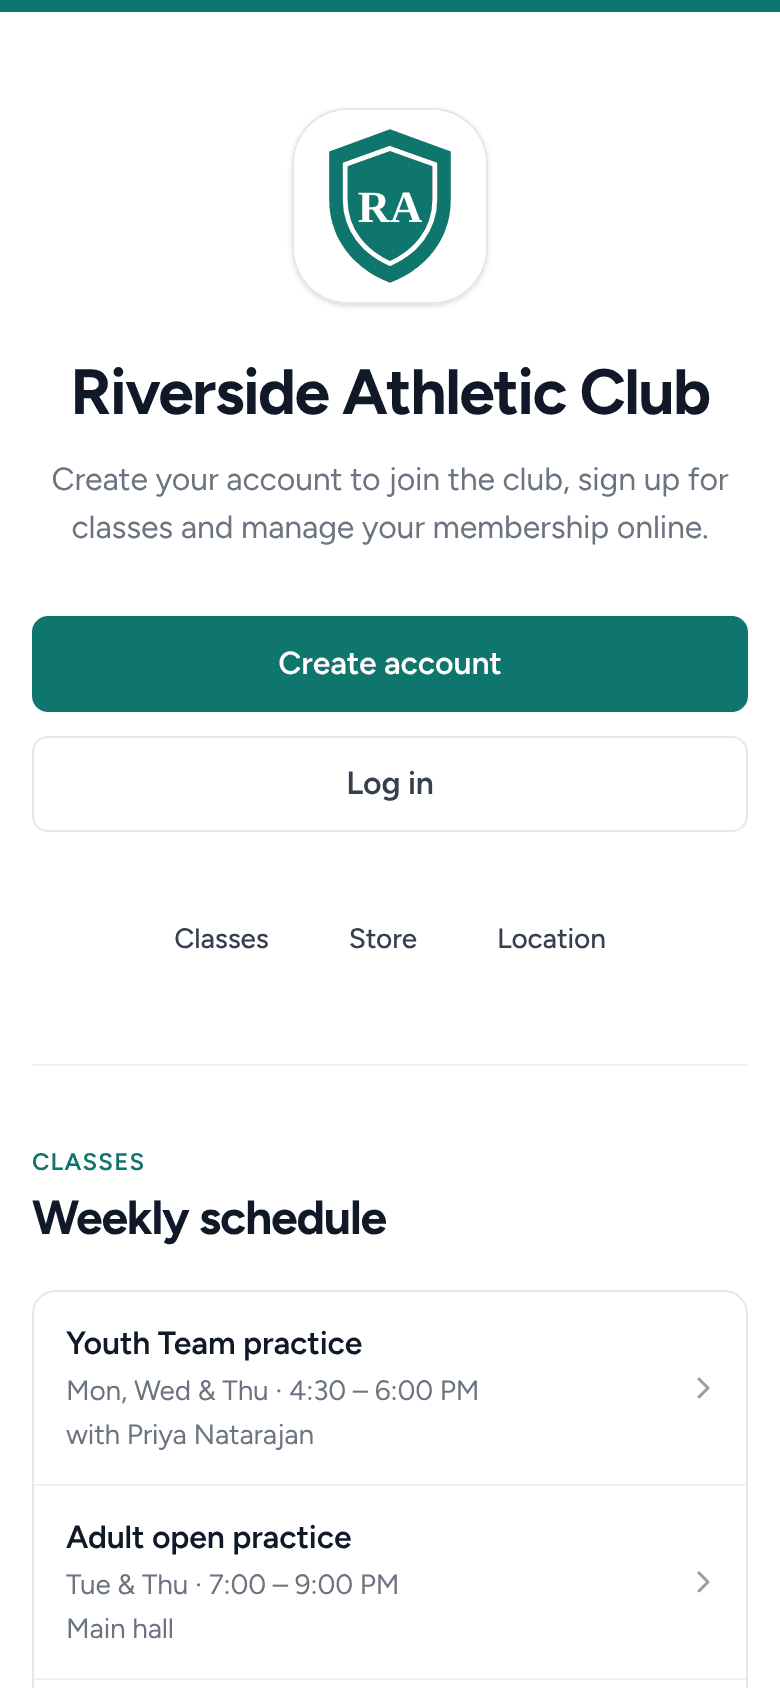
Club agreement (waiver)
Under Club Agreement on the Details tab, click Upload and choose a PDF. New members are asked to sign it when they create their account. Use View to check the file, or × to remove it.
Members: roster and invites
The Roster row opens a CSV upload, and Invite members copies your join link. Both have their own guides: Import your roster and Invite members.
Member fields (optional) adds details you want on every member, like T-shirt size or an emergency contact. Add fields opens the Member fields tab; see Add member fields.
Connect Stripe
Fencing Office takes payments through Stripe, and the money goes straight to your club’s Stripe account. You need it before you can charge members or sell in the store.
Go to the Store tab
Click Connect (or Finish setup) on the Connect Stripe row, or open Club SettingsStore.
Set up the business account
Under Business Account, click Set up. Stripe asks for your business details and the bank account for payouts. It takes a few minutes, and you can use an existing Stripe login.
Check it’s active
Back in Club Settings, Business Account shows Active and your available balance. View opens your Stripe dashboard.
Add products
Products are what members pay for: memberships, class packs, private lessons, gear. Add at least one on the Store tab with the + next to Products. The Storefront guide walks through every field, including monthly and yearly memberships.
Pro plan (optional)
The Pro plan unlocks the Attendance and Billing tabs on each member (charging, invoices and attendance). Click See plans on the last row, or open Club SettingsSubscription. The checklist counts as finished without it.